Creating a new Runchat
Creating nodes and inputs
Everything in Runchat is built from five basic nodes: Inputs for entering data, Agent for processing data and using tools, Create for working with generative models, Fetch for connecting to external services and Code for writing javascript. There are several ways to display the node creation menu in Runchat:- Double click on the canvas
- Press the space bar
- Dragging from an input or output parameter and dropping on an empty spot on the canvas
- (On mobile) tap the
+button in the bottom toolbar
Create -> Image node.
If you need to, you can delete a node or an edge by clicking on it then
pressing
Delete or Backspace.Write your first Prompt
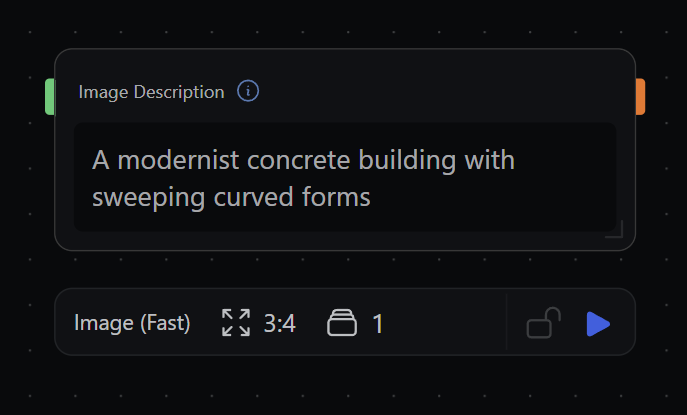
TheCreate node is used for all generative AI models in Runchat. You can create and edit images,
generate videos and meshes, and install your own custom models from Fal if required. If you’re using Runchat for design you will be working with the Create nodes 90% of the time.
You give the Create node instructions for what you want it to do using the Prompt input.
You can enter your prompt directly into the text input field on the node, or by connecting data from some other node in your workflow.
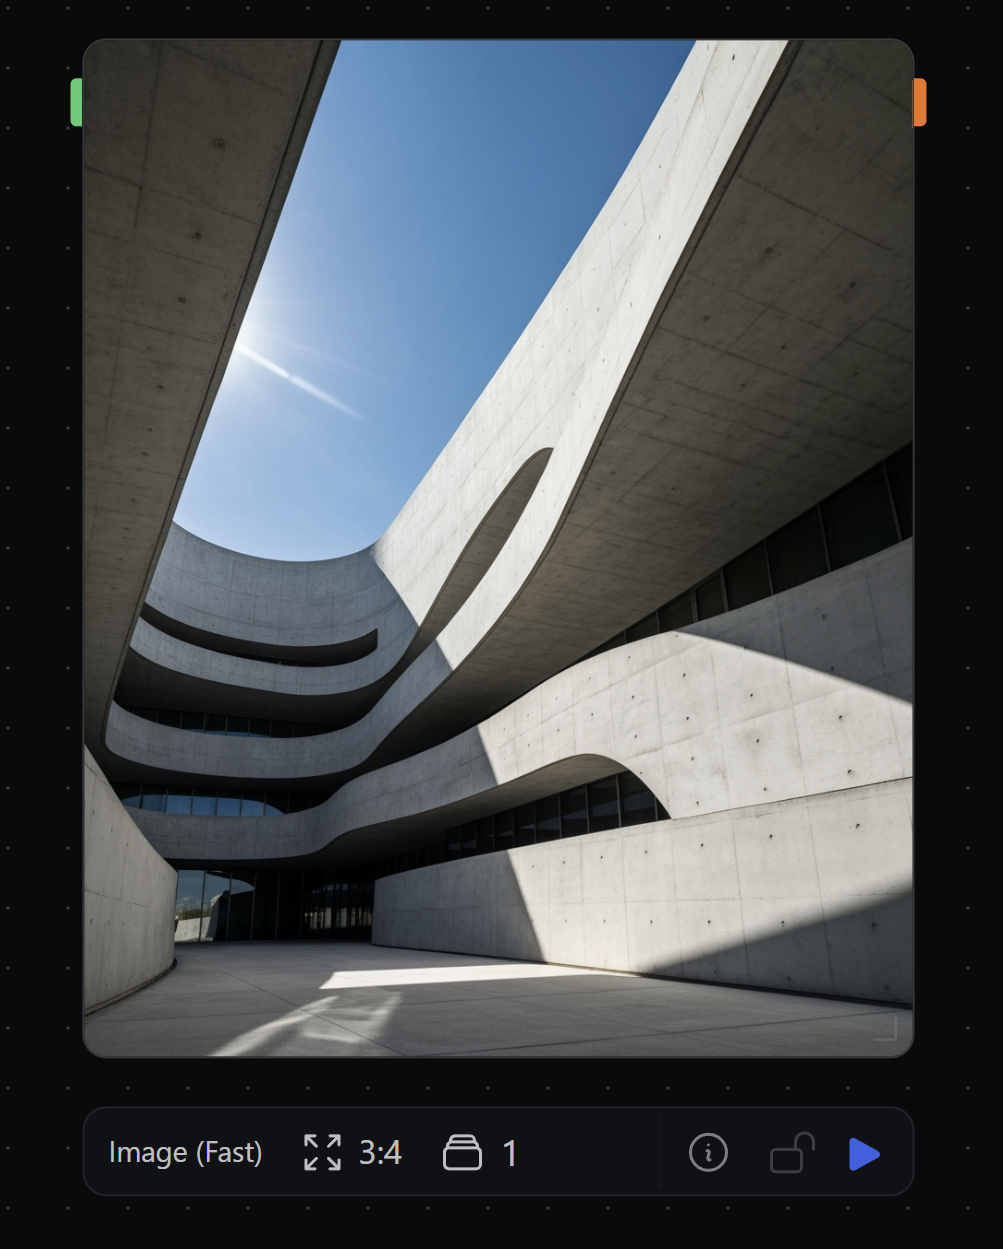
For now, enter “A modernist concrete building with sweeping curved forms”.
Running nodes
Inputs and outputs
OUTPUT toggle.
Running a node uses 1 credit. The free Starter plan gives you 500 credits to
play around with. The Imagen 4 Fast model is great for generating draft images
and costs 50 credits. The credit cost for running the model as well as the
output type is displayed next to the model name in the selection dropdown.
Creating input parameters
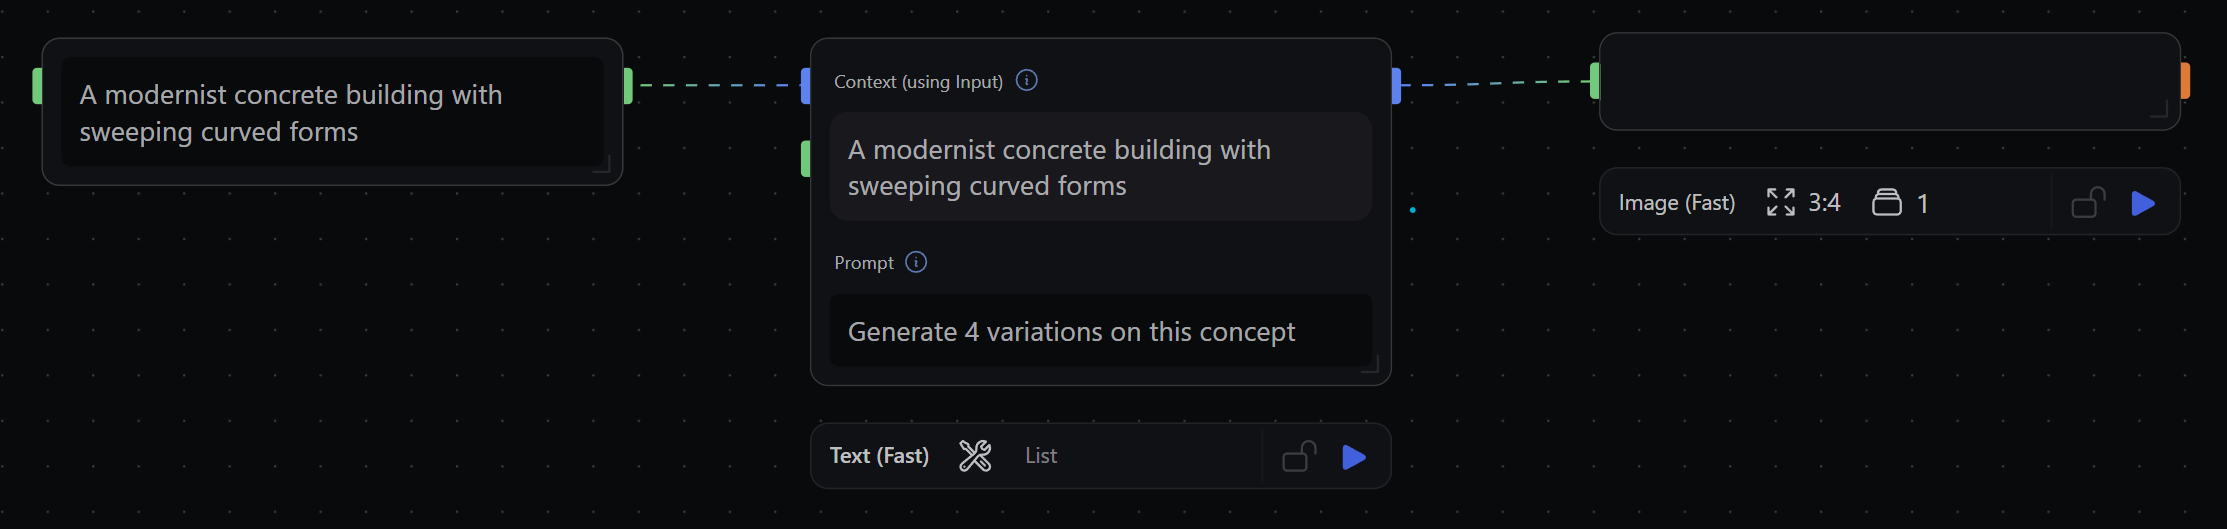
Now we will start building up some UI for our workflow that makes it easier to create variations on our prompt. From the node menu, create an Input -> Text node, and move this to the left of our canvas. Enter our initial design concept: “A modernist building with sweeping concrete forms”. We can now connect this text input to any input parameter in our workflow and use it in multiple places if need be.Connecting nodes
Runchat is useful for defining parametric relationships between generative AI models. We can control how data is passed from one node to another by creating edges. Add anAgent node and move this to between our input text node and our Create node.
Click and drag from the green output handle on our Input node to the blue Context input handle on our Agent node.
Our Agent node will now use the contents of our Input node as “context” for your prompt.
Then click and drag the output of our Agent node to the input on our Create node.
Now we have a full parametric workflow set up: We can provide some input (e.g. an initial design concept), modify this input
with our first prompt (e.g. to create variations), and pass these variations to a final node to illustrate them.
Edge colours indicate what type of data is moving between nodes. For more
information in this check the Core Concepts article on Data
Types.
Working with lists
Agent node to generate the variations on our initial concept.
In the node settings bar, change the output format from Markdown to List. This will force our output to be a list of values instead of paragraphs of text.
Enter “Generate 4 variations on this concept” into our prompt input field.
Scheduling updates
Whenever we change the inputs to a node, it will be scheduled for an update on the next run. Nodes scheduled for an update are indicated with dashed input edges. When we press the editor Play button in the top menu bar, all scheduled nodes will be run first. If there are no nodes scheduled for update then the entire workflow will be re-run. Press the editor Play button in the top menu bar to update all of the nodes in our workflow.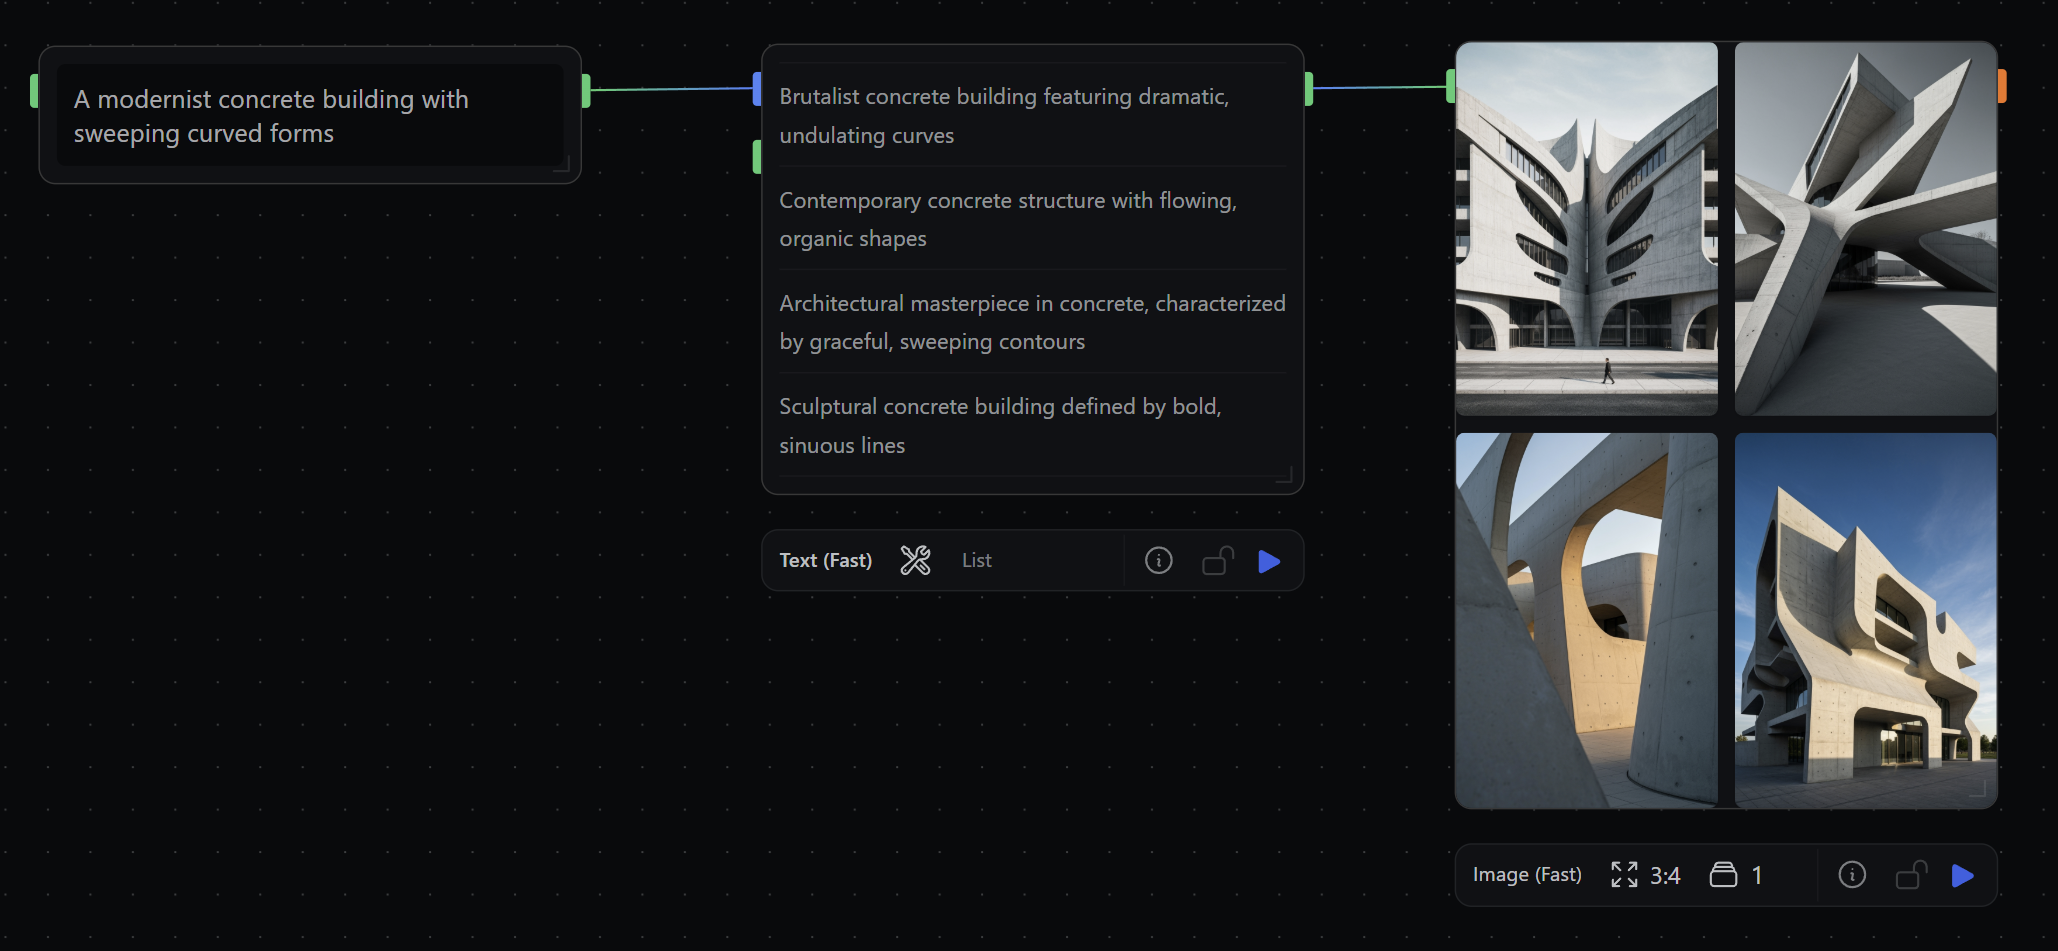
List outputs are displayed in a table view by default. You can toggle between
table and page view by hovering over the output page on a node and clicking on
the icons in the bottom right corner. This is also where you can download the
output data as a csv file.