Creating a descriptive prompt
Open the Runchat editor and click Start from Scratch to create a new workflow. Create a newAgent node from the menu and enter the following in the prompt:
Importing images
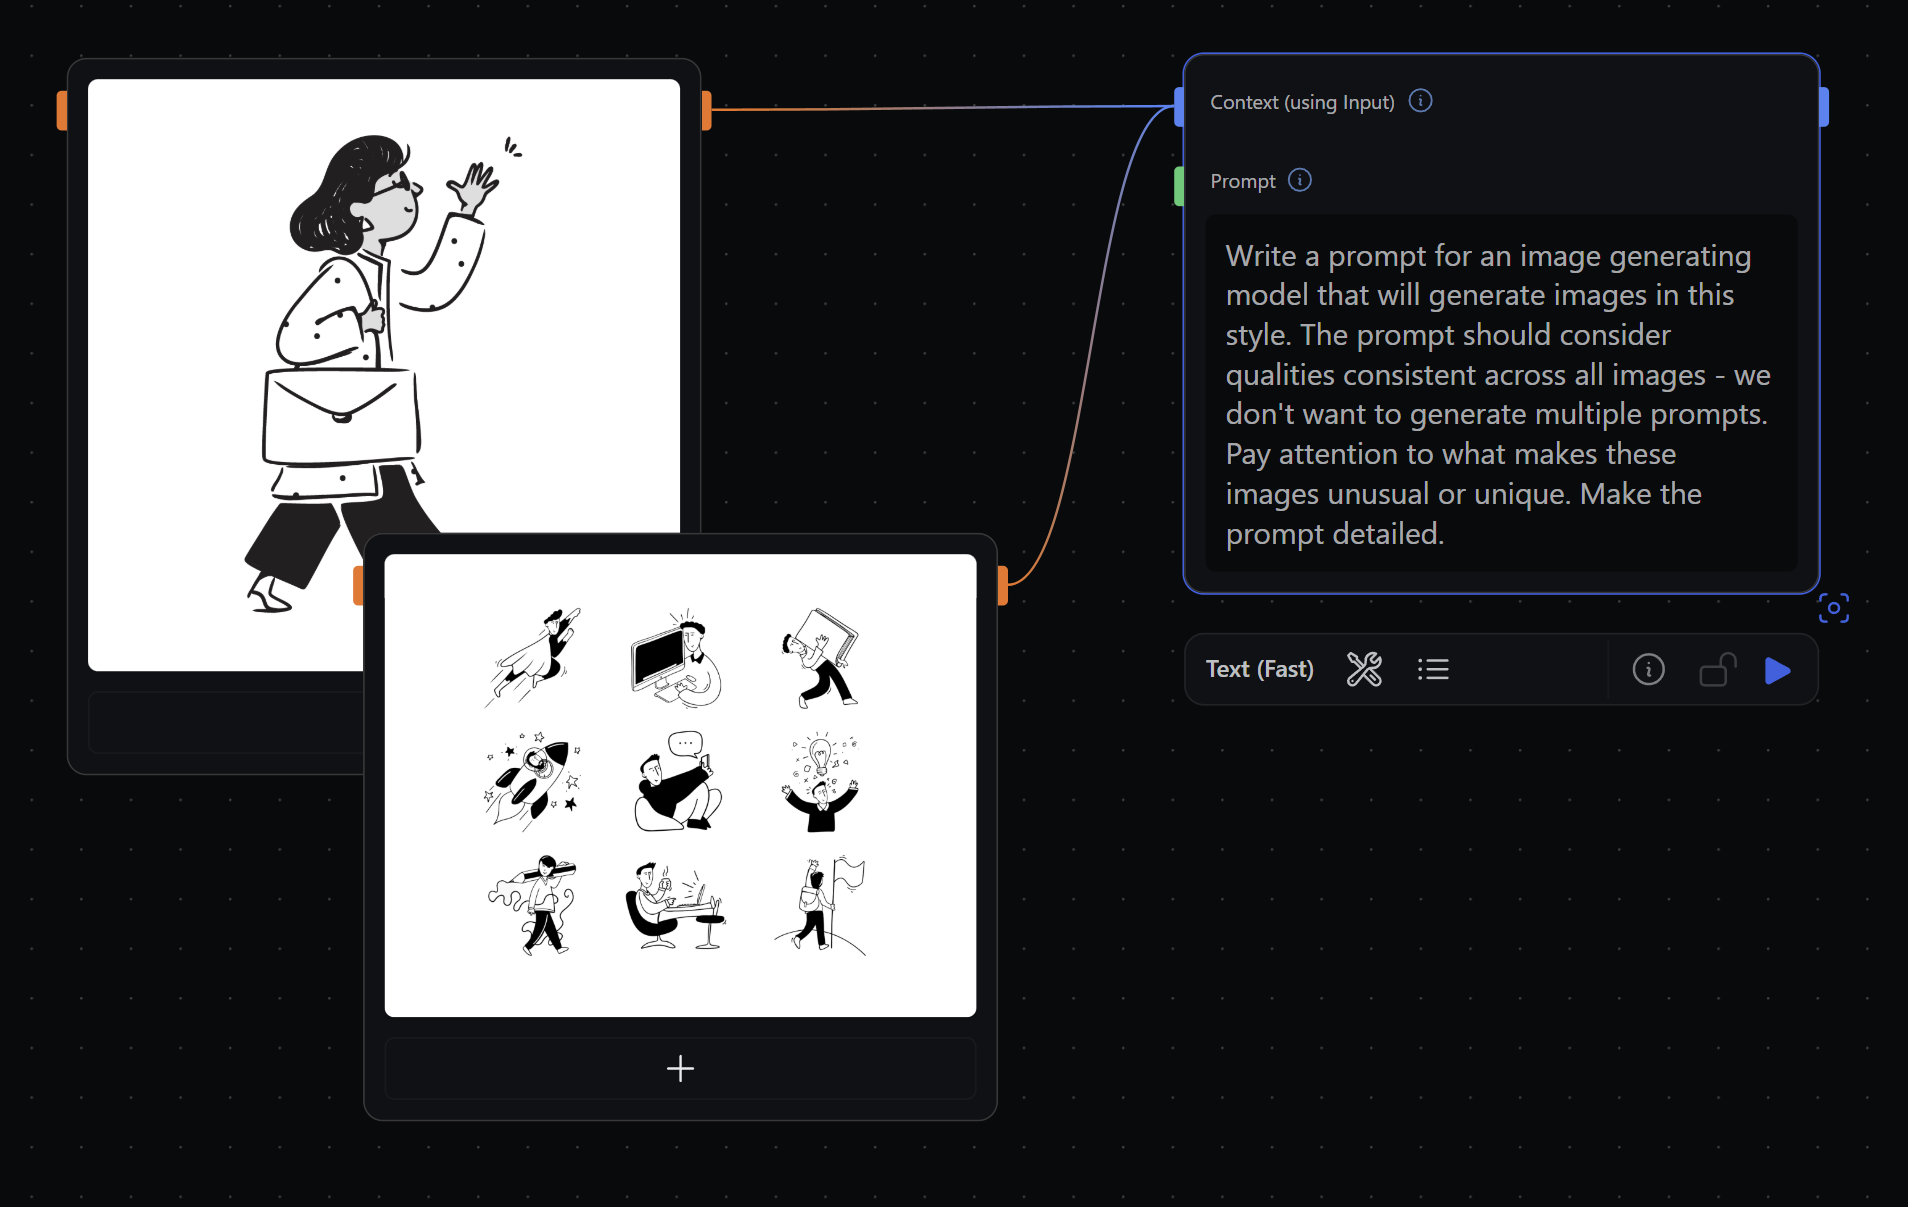
Agent node. There are several ways to import images into Runchat:
- Using the
Inputs -> File or Imagenodes - Entering a URL to an image in a
Inputs -> Textnode - Dragging and dropping an image file from your laptop onto the Runchat canvas
- Copying an image to the clipboard and pasting into the Runchat canvas
- Taking a screenshot and pasting into the Runchat canvas
Context input of the Agent node.
Merging Data
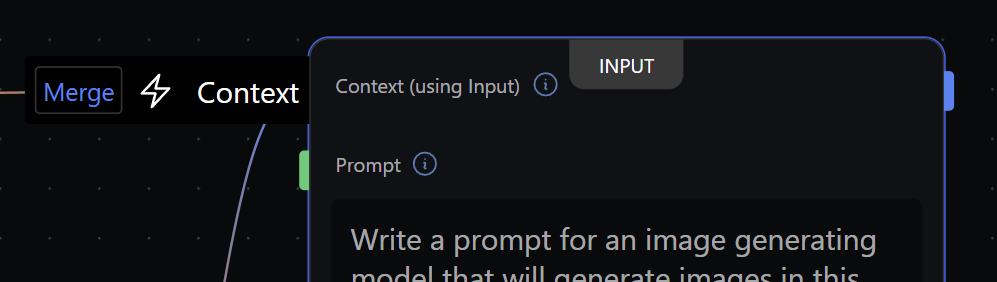
Context input and click Each to toggle the processing to Merge. Now our prompt will be provided with the list of all images we have connected,
instead of one at a time.
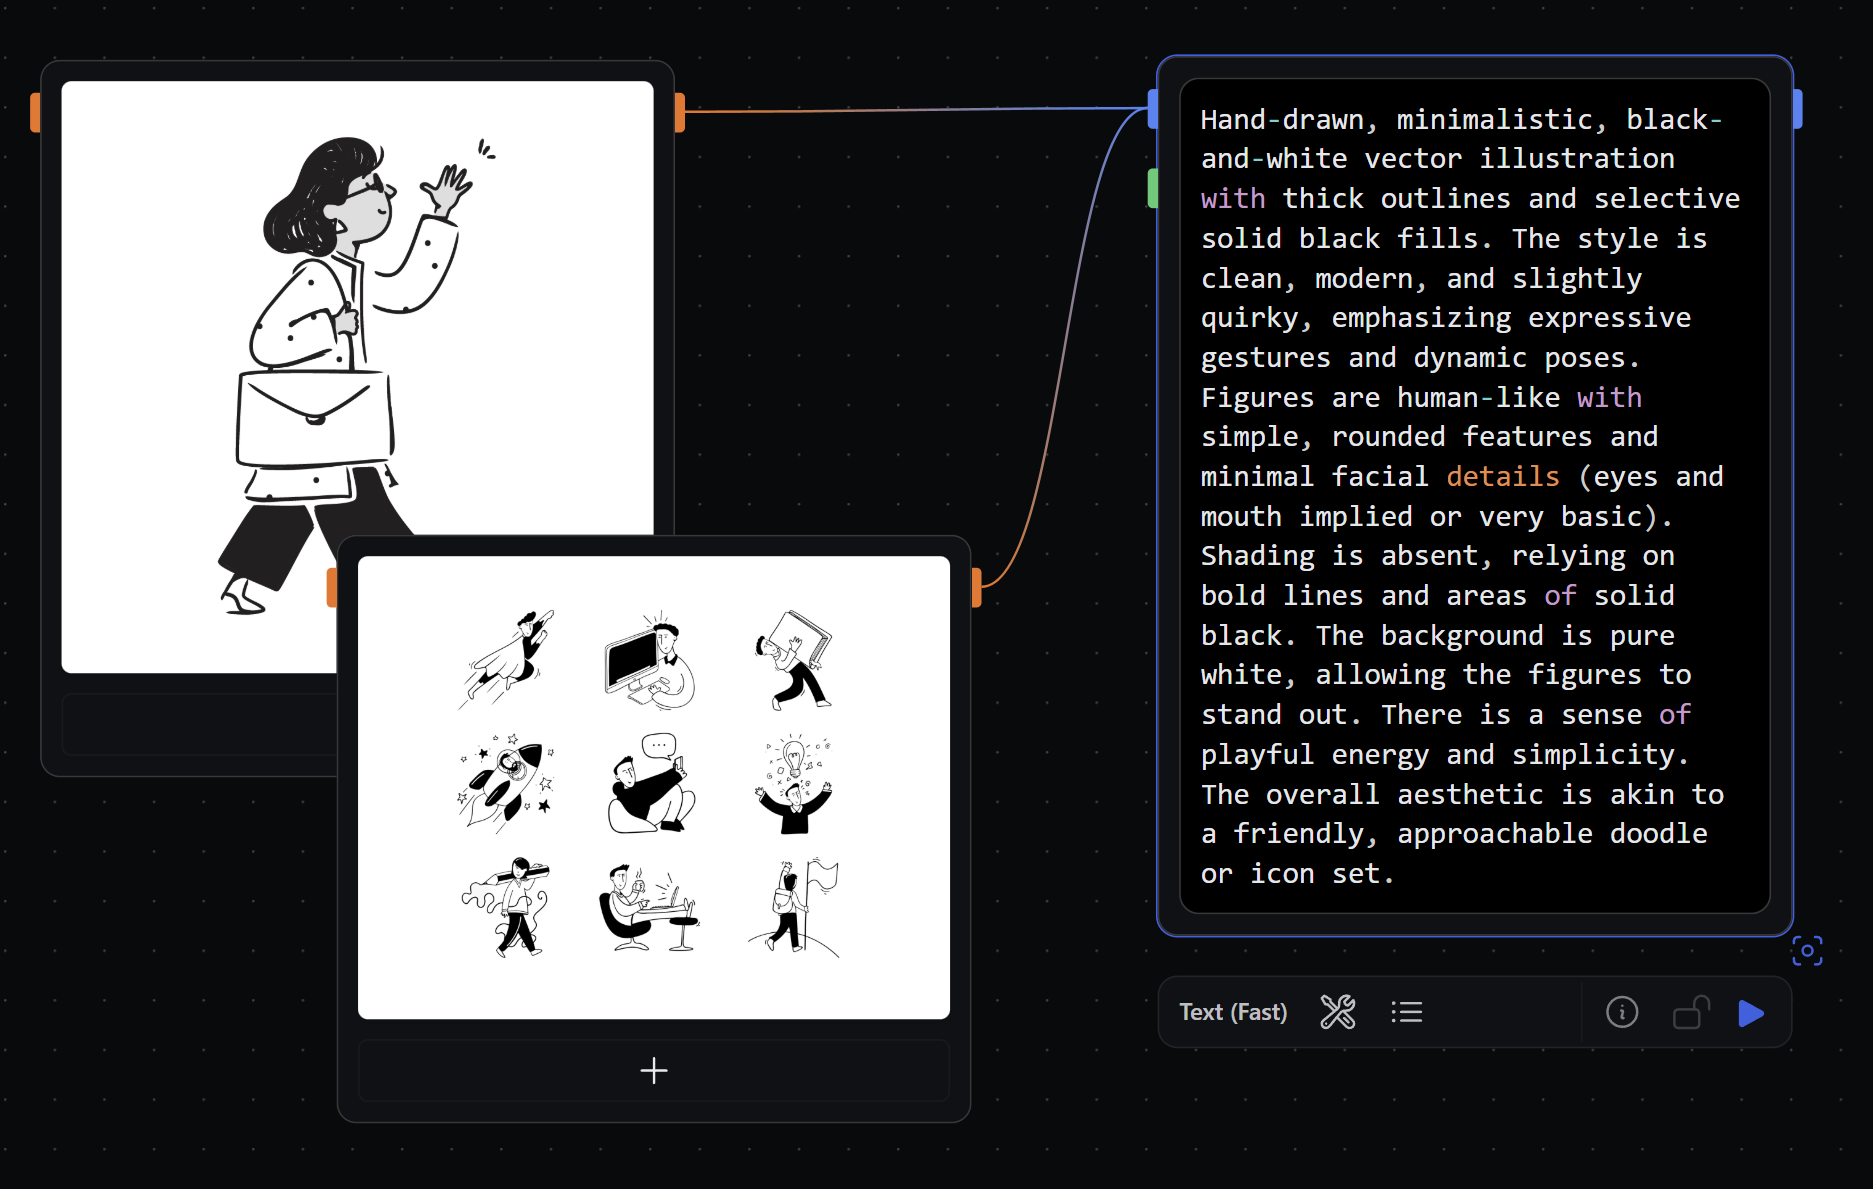
Press play in the editor or node toolbar to run our Agent node and see the resulting description.
Publishing parameters
Every node or workflow in Runchat can be published as a tool to be re-used in other workflows or called automatically in theAgent node.
To publish a tool, we need to specify which inputs we want to receive data, and which outputs we want to return data.
When we publish an input or output, the UI for that input or output will be used to create a new node or app and all other inputs and outputs will be hidden.
Before publishing a tool, you should delete any nodes that will not be directly necessary to generate the output.
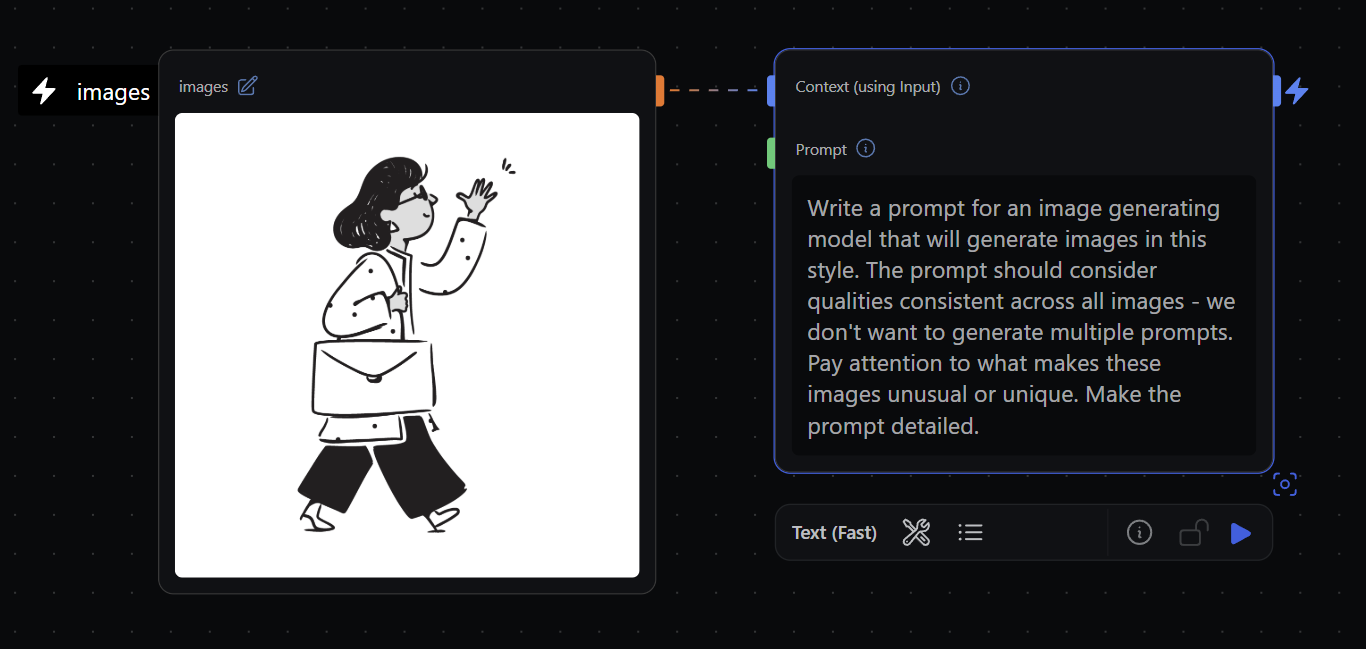
We will use a single Image input node as our tool input. This will mean that we can use the Image picker as our tool UI.
Keep one of your imported images and delete all of the rest. Hover over the input parameter on the image and click the 🌞 Sun icon to publish it.
For language models (and people) to know what our tool does, we need to give this input a name and a description.
Hover over the input parameter and double-click the black input text to edit it. Change the name to images.
Then click the edit button on the ‘images ✎’ label on the node and enter “Connect a collection of images to describe”.
Then hover over the Result output parameter on our Agent node and click the 🌞 Sun icon to publish the prompt output.
Sharing apps
Published tools can be shared as public web apps. This allows anyone to use your Runchat without needing to open the editor. To show a preview of your app in the sidebar, click Preview App at the bottom of the Runchat editor menu. If you want to try the app out - click import to select a new image and see if you can describe it. You can then copy a link to app view using the Share button next to the App header. You can close the App view again from the menu, or clicking thex in the corner of the app view sidebar.
Creating tools
To use our Runchat as a node or tool we need to publish it and add it to a Library. When we create a new Runchat we add a note node with some helpful tips. Create a new note node from the node menu. Click the note to edit it, and enter “Writes a detailed description of the aesthetic of a collection of reference images for the purposes of prompting image generation models”. Next, select all the nodes in your workflow and you will see a little button appear under the workflow title that says “Publish Tool” Click this, enter a name for your tool and click the green tick to publish. You can find your new tool in the Tools DashboardAdding to libraries
Click on the runchat menu and go to Tools and Templates. You should see your newly created tool in the grid. Hover over this and click on the library button in the top right. Enter “My Tools” as the new library name and click + to create the library and publish our tool. You should see a “v1” next to the runchat name when it’s finished.You can add multiple tools to a library, and can save a new version of your
tool without impacting other Runchats that use it.
Using tools in Workflows
Runchat can be used to automate complex process-specific workflows by providing language models with access to custom tools you have created. Create a new Runchat by clicking the Runchat icon in the menu, clickingNew Workflow then choosing New Runchat from the example grid.
Create a new Create -> Image node with the Imagen 4 Fast model. Click on the variations button in the node settings and change this to 2.
Now double-click to show the node menu, and click the toggle to Show Tools.
Create a Describe Images node from your My Tools library and connect the output to the prompt input of your image node.
Drop in some images and connect them to your images input to replace the default image that is referenced in the tool.
Press the Run button at the top of the editor toolbar to run our entire workflow using our new tool, describe our images and create a prompt,
and use this prompt to generate two new high quality images in a similar style.\
You can click on the expand icon in the node settings bar after running your
Describe Images node to show all nodes in this tool and their inputs and
outputs during the last run.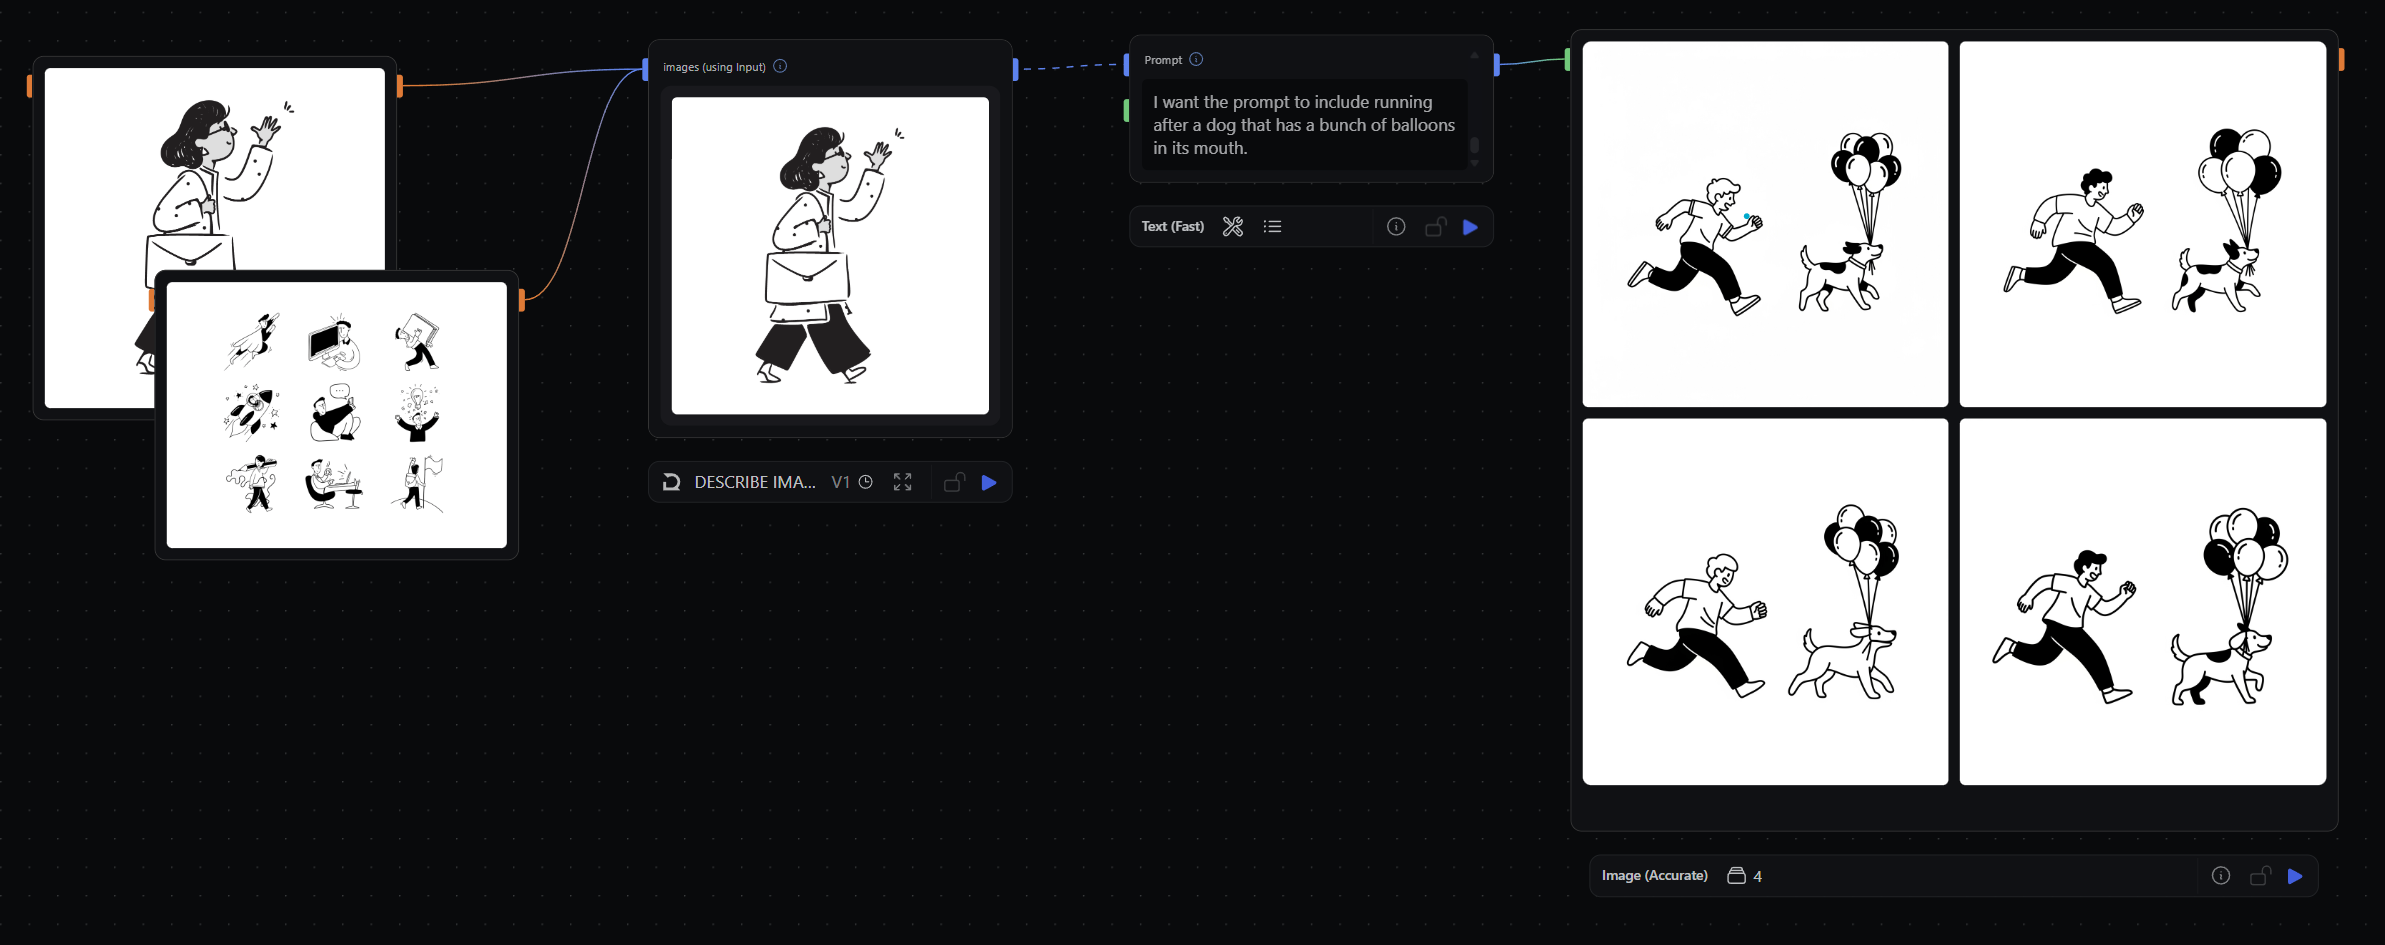
Context of a Agent node,
and then write a prompt that provides instructions for things to add. This is useful for controlling and directing the content.
Tool calling
We can use any workflow we create as a tool in another workflow, or as a tool in anAgent node that can be run automatically by language models.
As an example, create a new Agent node.
Click on the Tool icon in the node toolbar and search for “Describe Images” and find the tool we just created. Click on it to add it as a tool.
Now, if we connect some images to the context and just ask our prompt to “describe the images”, it will get used automatically!
Tools are especially useful for making requests to external resources like databases or third party APIs.
You can build tools in runchat for searching the web, reading and writing to spreadsheets, sending emails and just about anything else that you can think of.